Managing acquired information in an information age

Success in the information age hinges on managing the explosion of available information in meaningful ways. To even approach this goal requires a successful information management strategy, which revolves around the questions

  • “How do I find relevant information?”

and its corollary:

  • “How do I manage the information I’ve found?”

On a personal note, these are two of the questions that drive my own technological explorations. Brainstorming and note-taking methods and tools provide another side to the issue. This post is intended to provide some background and framework for said exploration.

How do I find relevant information?

Online information is typically located through complementary methods of search and discovery.

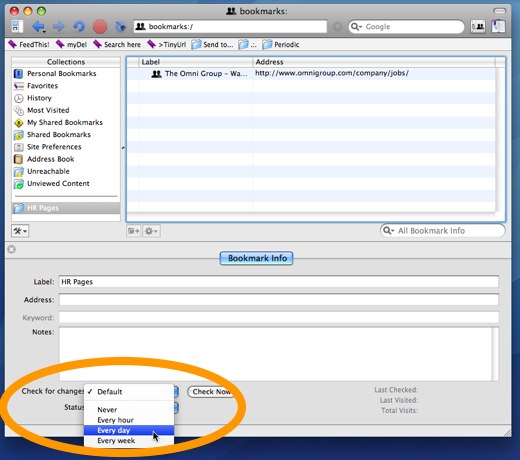
Traditional search technologies will long remain the first resort for information-seekers. Desktop search clients are also available for advanced data mining and research. Yet the rising semantic web is the true future of the Internet, and will enable users to interact with information in more meaningful and relevant ways.

Relationship-based information discovery is rapidly adding an important layer over traditional search tools. Social microsharing platforms (e.g., Twitter) and more robust social platforms (e.g., Twine, in private beta) allow individuals to build a liminal space of like-minded individuals with similar interests.

Two points are worth iterating here:

  1. Social networks are becoming a search sphere in their own right. For me, the Twitter ecosystem has become my trusted first source of user opinions; for many types of information, I search on Twitter before going to Google or DEVONagent.

  2. More and more information is shared and recommended through these relationship-based services. In other words, social networking platforms allow information to be discovered rather than explicitly sought.

Search once, not twice

The key to a useful information management strategy is this: You should only have to find a piece of information once.

Search tools should not be relied upon to find specific pieces of previously located information. If it takes more than fifteen seconds to locate online, it should be in your personal information system, not left to The Google.

If you spend a lot of time looking for information you’ve already encountered, your system is broken and you’re wasting your time. Or your employer’s time. Either way, that time should be spent turning information into knowledge, or putting it to use.

So: what to do with all this acquired information?

Tools of the trade

To be effective, an electronic document management system (EDM) should be:

  • Accessible — it’s available when and where you need it (for both archive and retrieval)

  • Flexible — able to accept input from any variety of sources

  • Scalable — can accept many thousands of documents without becoming unwieldy

  • Searchable — the system is worthless if you can’t find what you’re looking for

  • Extensible — it can be extended through scripting or other means

  • Open — It doesn’t hold your information hostage when you need to change systems

The most rudimentary means of storing information – file systems – fail where it matters most. Because file systems are not designed for this type of data management, they are not truly accessible (saving an excerpt from a website, for instance, is a many-step operation), or quickly searchable (your data are hidden amongst tens of thousands of irrelevant system and program files). In addition, file systems don’t provide end-to-end data functions, so viewing the contents of most file types requires launching another application. Add-on tools like Google Desktop mitigate some of these issues, but they’re no match for a real EDM system.

True EDMs are specifically designed for the task archiving and retrieving information. They can store images, text clippings, and documents of all types; add content indexing to the mix (allowing users to search by any word contained in their files); and are streamlined to allow quick archiving of information. EDMs can be implemented as software-based solutions (see Yojimbo, EagleFiler, and the like), as well as online (see Google Notebook, for instance).

Second-generation information managers like DEVONthink and Twine take content management a step further, adding semantic intelligence and useful content analysis to the user’s database. DEVONthink, a tool that I’ve used for years, analyzes the contents of its articles to identify non-obvious semantic relationships and assist with automatic filing. Twine performs similar functionality in the context of a social network, in theory promising to integrate the most relevant search, discovery, and EDM tools.

Live in the cloud…

As computer usage becomes increasingly network-centric and social, individuals are becoming more and more willing to trade privacy for the convenience and utility of web-based services.

Put another way, we are becoming more willing to keep our information in “the cloud”. (I like the cloud metaphor because, for me, it conjures images of Benjamin Franklin flying his kite in the electric storm. There is energy and power and excitement in the cloud. There’s also risk.)

This trend will spell dramatic shifts in EDM solutions to come. Soon all our data will be accessible from any web-enabled smartphone or computer, anywhere in the world. (And with customs agents able to search the contents of any electronic device with impunity, business travelers may soon be required to keep sensitive data online, not on their machines.)

But online services are not a silver bullet—yet. As a general rule, the current generation of Web 2.0 apps:

  • Make it difficult to work offline (technologies like Google Gears may soon obviate this concern)

  • Don’t take full advantage of OS-level services, keyboard shortcuts, etc

  • Are not easily automated or scriptable

  • Make it difficult to back up files (FUSE applications may change this in the near future)

  • Put users at the mercy of others for data integrity (Granted, it’s vastly more likely that you’ll lose data from your own hard drive crashing – rather than Google’s servers going kaputt – but either scenario is a possibility. Pick your poison)

…with your feet on the ground

Until these concerns can be fully mitigated, the most promising path forward lies in hybrid desktop/web platforms that allow users to maintain local and online control of information.

These may be end-to-end solutions (for example, the NewsGator family of products includes web- and software-based newsreaders that are fully synchronized) or more specific sync services (Plaxo, for instance, synchronizes desktop calendar and address book clients with online equivalents). When implemented correctly, these tools can be phenomenally useful.

I’ve been waiting for this same innovation to make its way to the world of EDM apps, and there are some promising options emerging. A limited example is DEVONthink Pro Office, which has a built-in web server that provides remote access to your database. (First impression: it’s slick, but you’re out of luck if you’re stuck behind a firewall or the database isn’t running.) Evernote is a new EDM tool with full desktop-to-web synchronization tools, as well as limited online editing.

The beginning

Ultimately, any EDM solution is only a tool — but it may be the most important tool in the arsenal of knowledge workers. It is therefore of critical importance that we take our EDM strategies seriously.

You may not yet have an EDM strategy. But creating one may be the most important step you can take in your development as a knowledge worker.

Take a moment to think about how you manage what you know. Start exploring technologies, asking how they can improve your knowledge set.

It may take months to work out a reasonable system of your own… but it’s a beginning, and one well worth making.

Brainstorm in XMind, work in OmniFocus

It’s the best of all possible worlds! Now you can brainstorm in XMind and import directly into OmniFocus via Udo Gaetke’s clever AppleScript. The script creates a project from your map’s root node and actions (or subactions) from the other nodes.

Thus, this:

XMind plan

Becomes this:

OmniFocus Plan
Via Skitch

Get the script here (forums.omnigroup.com)

Notes:

  • Although XMind isn’t scriptable, the XML file format is open; his script digs into the XML structure to pull relevant data

  • The script contains a property called import_folder. You’ll need to create a folder in OmniFocus with this name before running

  • The script contains a “rm -f” operation. This deletes a temporary XML file created by the script. You may want to peruse the script yourself before running

The tech-enabled job hunt

Tracking job opportunities can be tedious, particularly when companies use static pages to list their vacancies. The following methods can increase the efficiency and effectiveness of your online search.

Tracking jobs with RSS feeds

The best option for tracking jobs, of course, is through the company’s own RSS feeds. Many companies provide said feeds, and in this case it’s simple: visit the site, subscribe with your newsreader, and wait for new opportunities to roll in.

Nice – but what about the (vast majority) of companies that don’t provide feeds?

Tracking jobs with OmniWeb

With its ability to periodically check your bookmarked sites for changes, OmniWeb (Mac only) can be an invaluable tool in the job hunt. Simply set your bookmarks and let it do the legwork for you.

Workflow:

  • Find an organization of interest

  • Bookmark the organization’s HR page, setting OmniWeb to check for changes daily

  • Monitor your Dock for OmniWeb bookmark updates

This is, incidentally, the method by which I found my first job in D.C. It works with the majority of companies I’ve looked at.

Creating custom job feeds

A third option is to create your own RSS feed for a company or organization. Feedity and Dapper allow you to create custom feeds from web pages. Dapper is a more powerful service, but Feedity is simpler to set up and doesn’t require an account, so I’ll use Feedity in this example.

Suppose you’re looking for a job with the Omni Group. (In reality, they already provide a job feed; we’ll just pretend they don’t for the sake of example.)

  • Find the HR page and copy the URL.


  • Go to Feedity.com and paste the URL in the main field. (If you have the Feedity bookmarklet installed, a single click from the HR page will do this for you.) Select a category for the feed and choose “Preview”:


    Feedity will show you the links it has extracted; this represents the content that will show up in its RSS feed. If you’re not satisfied with the results, select “Try refining…” to hone in on the results you want to appear in your subscription.


  • When you’re ready, you can subscribe by clicking on the RSS icon, or select from their other subscription options:

Limitations

Some job sites are more interested in tracking you than letting you track them. This can be a problem if each visit results in unique page URLs being generated for the job pages. In this case, Feedity will think each job is new every time it crawls the site — so you’ll get duplicates.

In cases like this, try using OmniWeb, or see if you can get results out of Monster, LinkedIn, etc.

Access 1Password data on your PC via Firefox

5/26/10 update: I haven’t tried this in a couple years, so consider these directions outdated. If you have any luck, feel free to leave a comment.

Important: As of 8/6/08, version 2.7.2 works interchangeably with the current versions, but this may change without notice.

Updated 7/28/08 to address truncation issues with Safari

1Password, the acclaimed password manager for Mac, recently introduced an iPhone export function that provides on-the-go access to sensitive data. This is accomplished by creating an encrypted bookmarklet in Safari, which is in turn synchronized to your iPhone. Excellent.

Firefox recognizes this bookmarklet as well — meaning that Windows-by-day users no longer have to suffer without their critical logins. (Note that this trick does not work with Internet Explorer.)

To accomplish this:

  1. In 1Password, click on the “Sync to iPhone” icon in the toolbar and choose an access code for encryption. (This will create the bookmarklet in Safari.)

    Setup Sync
  2. Switch to your Safari bookmarks, where you will find two new categories, each with a bookmarklet. The 1Password bookmarklet enables a browsable list of all your 1Password data; the 1Password Logins bookmarklet provides a one-click login to the current page.

    Bookmarklets in Safari

    The data in the Address column is what you need to copy to your PC; however, Safari only lets you copy the first 32,000 characters of a bookmark’s address field, so copying from here is likely to fail. To work around this, drag the bookmark to Firefox on your Mac (either directly or via the Finder) to copy the data there. Then, in Firefox, select the bookmarklet properties. This is what you’ll see:

    Bookmarklets in Safari

    Hit Tab once to select the Location field. Copy the text into a plain-text file, and email it to yourself.

  3. Get it onto your Windows machine. (Easiest method: email it to yourself using the aforementioned plain text file.)

  4. Finally, create your bookmarklet in Firefox. To do this, first bookmark any page to your Firefox bookmarks bar. Then, right-click on the bookmark and choose “Properties”. Rename it as desired (“1P” suffices for my needs), and replace the Location field with the long string you emailed to yourself. For the 1Password bookmarklet, you’ll want to select “Load this bookmark in the sidebar”. For the 1Password Logins bookmarklet, leave it deselected.

    Create Bookmarklet

Firefox now has a secure, functional bookmarklet with your passwords and other data available.

1Password Logins bookmarklet in action: 1Password Logins bookmarklet

1Password bookmarklet in action:

Secure Entry Interface

(Use of the search function is recommended here as the tool sorts web forms by name)

1Password also provides a full-fledged html export, which you can keep on a thumb drive or upload to a server. (I wouldn’t recommend uploading the file — out of 6 billion people in the world, surely someone is bound to find the file and start playing.)

Bonus: For even easier synchronization, install Foxmarks to synchronize your Firefox bookmarks between your Mac and PC. Now you can copy straight from Safari to Firefox on your Mac and let Foxmarks do the synching. Update: Foxmarks didn’t work with the 1Password bookmarklets the last time I tried it; your mileage may vary.

OmniFocus Defer Script

OmniFocus rocks. I can’t really imagine managing myself personally or professionally without this tool. Nevertheless, despite thousands of hours of development and beta testing, it has its share of quirks. Notably, in my work I have a few daily-type tasks I set to repeat every day. Unfortunately, there’s no “workday” option in the repeat choices, so every weekend I end up with a Saturday and Sunday repetition. I could either:

  • Mark them complete (ignoring the fact that I’ve just claimed to have done nonexistent work);
  • Mark them complete and delete the “done” items before they disappear (solving the first issue)
  • Change the start/due dates in the Inspector (cumbersome)
AppleScript to the rescue.

My Defer script allows you to defer, or ‘snooze’, selected projects or tasks by a given number of days. (Disclaimer for GTD pedants: my use of the word “defer” here is sanctioned by the New Oxford American Dictionary, not David Allen.)

Usage: Select the task(s) and/or project(s) you wish to defer. Invoke the script from the toolbar or script menu:

OFDS_1

Enter the number of days to defer the items in the resulting dialog box and select “OK” (default is 1, so feel free to just hit Return to ‘snooze for a day’).

OFDS_2

The script will then prompt you whether to defer both start and end dates of the items. “Due [date] only” is the default option, so again, feel free to hit return to snooze your due date only.

OFDS_3

Finally: a Growl notification to signify your success. (If desired, you can use a standard OS alert dialog or no alert at all. See the script for details.)

OFDS_4

Download here.

19 Feb 2009: version 0.2 is now available. Release notes here. Download link is for current version.

XMind 2008 updated to version 2.2

XMind 2.2 was released last week. The upgrade introduces some improvements and bug fixes (list here), although printing remains buggy.

I’ve submitted formal feedback re: the printing issues; please do the same. Mango Software, the company behind XMind, have been very responsive to my emails in the past.

Quickly file Exchange-based emails using Entourage

Managing the torrential flow of work email used to be an onerous task, but a healthy combination of email habits and scripts simplify the flow greatly. Personal experience has demonstrated that email is best handled with a GTD-inspired triage system, à la this one. Spotlight on the Mac and Copernicus on Windows make dredging up old emails a cinch.

Even with a simplified organization structure, it can be time-consuming (or RSI-inducing) to triage your inbox. I find that when it takes longer than a second or two to file an email, I’m more likely to just leave it in my inbox — defeating the value of the system.

Although Outlook in Windows is my preferred professional email client, I use Entourage for email triage because it’s just faster. With a few simple Applescripts, filing any number of emails is a single keystroke away.

[code lang="AppleScript"]
property destFolderName : "@ACTION"
property exchangeAccountName : "CHCSII"

tell application "Microsoft Entourage" set destFolder to folder destFolderName of Exchange account exchangeAccountName set currMsgs to (current messages) move currMsgs to destFolder end tell[/code]

Save the script as “Action \ca.scpt” in your Entourage Script Menu folder (located in ~/Documents/Microsoft User Data/) and you can activate it instantly with Control-A. Change the “\ca” suffix to change the shortcut.

Bonus #1: Change your Caps Lock key to Control in the Keyboard & Mouse control panel (under “Modifier Keys…”) and the script is even easier to activate.

Bonus #2: If you have Growl installed, add the following code below “end tell” in the above script and you’ll get an unobtrusive confirmation that your email has been filed in the right folder (useful for the oh-shoot-did-I-just-move-that-to-the-right-folder moments):

[code lang="AppleScript"]
tell application "GrowlHelperApp"

set the allNotificationsList to {"General", "Move message", "Error"}
set the enabledNotificationsList to {"General", "Move message", "Error"}

register as application ¬
    "Entourage AppleScripts" all notifications allNotificationsList ¬
    default notifications enabledNotificationsList ¬
    icon of application "Microsoft Entourage"

--  Error Notification...
if (count of currMsgs) is 0 then
    notify with name ¬
        "Error" title ¬
        "Error" description ¬
        "No message selected." application name "Entourage AppleScripts"
end if

--  1 Notification...
if (count of currMsgs) is 1 then
    notify with name ¬
        "General" title ¬
        "Exchange Notification" description ¬
        "1 message moved to " & name of destFolder application name "Entourage AppleScripts"
end if

--  Multi Notification...
if (count of currMsgs) > 1 then
    notify with name ¬
        "General" title ¬
        "Exchange Notification" description ¬
        "" & (count of currMsgs) & " messages moved to " & name of destFolder & "." application name "Entourage AppleScripts"
end if

end tell[/code]

XMind Review (XMind 2008 Professional for Mac)

XMind is a recently introduced mind mapping tool available for Mac OS X, Windows, and Linux. I purchased XMind several weeks ago and have found it to be a robust and rewarding tool, though it’s certainly not without its issues.

Basic features

Data entry – The ability to quickly add and edit information is the single most important feature of a mind mapping tool, and XMind makes input fast and painless. Return inserts a sibling topic, while Tab inserts a subtopic. (This is a faster interface than MindManager, for instance, which requires command-Return to insert a subtopic.) Return inserts a sibling topic. Command-Return inserts a parent topic, and Shift-Return creates a sibling topic before the selected topic.

Navigation – With a single-button mouse, click-and-hold on any free space in the map to drag the map around. Even easier, right-click drag for instant dragging.

Labeling (tagging) and Notes – Labels can be added to any map item and used to quickly filter large maps. One suggested use would be to attach names to action items. Rich-text notes can also be appended map items, and edited in the map or a sidebar.

Visual editing – XMind includes a wide array of layout and editing options. Topics can be displayed with a variety of orders, from diamonds to callouts. Line options include simple curves, hard and soft elbows, straight lines and more. Spiny (thick) and rainbow lines are available as well.

Numbering options are basic but functional; for each level of the mindmap tree, you can select Roman numerals (I, II, III), Arabic numerals (1, 2, 3), and capital and lowercase letters (A, B, C or a, b, c). In addition, each sheet/tab can have a separate background color or image.

Visual Themes – Most usefully, XMind supports visual themes, which can expedite editing multiple documents. To create a theme, simply edit your document as desired, then select “Extract theme”. A new theme will be created to match your current document styles.

Audio notes can be added quickly to a topic. They’re saved in MP3 format, although currently there doesn’t seem to be a way to extract your audio notes.

Killer feature: embedded layout options

For me, the killer feature of XMind is the ability to utilize multiple layout structures within the same map. Options include traditional mindmapping structures (map, left tree, right tree, logic charts, org charts) as well as 2D chart (analogous to a spreadsheet clipping) and fishbone diagram options.

Structure options.png

Although other mappers have this feature, its XMind offers more flexibility than its Mac OS-compatible counterparts.

Embedded structures.png (Click for full size)

Quirks

Editing

At present, there is no way to create a parent topic with multiple siblings selected; you must create the parent topic for one topic and drag other topics into it.

More frustrating, there is currently no keyboard-only option to edit a topic; typing overwrites the selected topic, so you need to use the mouse for this purpose. (XMind team: please fix this in an upcoming release!) [UPDATE: F2 now enters editing mode for the selected node.]

Format lock

While XMind readily imports from MindManager and FreeMind, it provides no way to save in other formats (MindManager, FreeMind, or even OPML). That said, if you desperately need to share your data, you can copy and paste into OmniOutliner. From there, export to OPML. Other programs can read this format quite easily. [UPDATE: XMind now exports to MindManager 7 format.]

That said, XMind documents have worked flawlessly between my Mac and PC.

Audio Notes

In the map area, you must double-click the Play button to play an audio note. Odd. [UPDATE: A single click now plays the note.]

Printing – caveat emptor!

[UPDATE: Printing has been improved significantly. Retaining this section for historical context, but note that many of these criticisms have been addressed.]

Printing in XMind is seriously flawed. To start, there is no Page Setup dialog box. Any page setup options are performed via a combination of the print dialog box and printer-specific settings. (To get a horizontal page layout, for instance, you have to go select the printer options setting, which brings you first to the OS X-standard Page Setup dialog box, then a Print window. Clicking “Print” from here does not print the document, as one might expect, but brings the user back to the Java print window.)

Worse, XMind has yet to learn the concept of a centered document. Printing with the default 5mm margins yielded a printout that was both off-center and clipped. I tinkered for a while and finally got a well-centered document with a 40mm left margin and 0mm right margin — though the built-in preview has no bearing on the final product. For example, this XMind preview:

Print 4.png

…resulted in this print job:

Print 5.png

To see what your document will actually look like without wasting paper, go through the printer options setting to the OS X dialog box. Instead of selecting Print, choose Print Preview. Although this will return you to the Java print box, when you finally choose Print you’ll get the Mac preview.

A note about Java

I expected Java to be a major issue for me. On the Mac, I want Mac-like apps with Services support, AppleScript options, etc. That said, XMind has done an amazing job harnessing elements of the Mac OS interface. Notably, it uses the native Mac open and save dialog boxes (failure to do so would have been a deal-breaker for me), and can summon Apple’s Color Picker utility instead of the standard Java fare.

Final thoughts

Although XMind feels like a late beta product, it’s a strong contender for the cross-platform mind mapping market. If on-screen editing (rather than printing) is your intended primary use, give it a whirl.

Also, to their credit, the XMind team have been very responsive — they have responded to several separate email requests and seem intent on improving the product.

Pros:

  • Extremely robust mapping options
  • Responsive customer support
  • Strikingly adept Java implementation on the Mac

Cons:

  • Printing is extremely frustrating
  • Java-based means no Mac OS Services; no AppleScript support
  • No industry-standard export options
  • Quirky

MacBook as an accelerometer

On a recent bus ride from work to the Vienna Metro station, I noticed the ride was rather rough and decided to take a closer look. Using SeisMac, a tool that uses my MacBook’s sudden motion sensor to take motion measurements, I recorded some key parts of the ride.

Because the computer was on my lap, the Y axis served as a crude accelerometer; when the bus accelerated, the front of the bus was raised a little (and I was therefore pitched back a little, causing the Y-axis reading to increase), and when the bus slowed down I was pitched forward, causing the Y-axis reading to decrease.

Exhibit 1: I-66

Getting on I-66, we began accelerating significantly at about 6:17:25. We hit traffic pretty abruptly and slowed down at 6:17:45, and then hit some rough potholes around :53 (see the Z-axis)…

78B364A9-82F2-4E1C-8C11-FC60D0DA5255.jpg

Exhibit 2: Vienna Metro

Exiting I-66 to pull into the Vienna Metro station:

vienna.jpg

At 6:22:29, the bus was in a 3-way-stop traffic pattern at the Metro station (note how I was so violently pitched forward and backward). About 6:22:42, the bus made its final acceleration before letting the speed bleed off, coasting into its spot at the station.

Note: I originally posted this at livandan.com